 Mowo
The level viewport
Fly the editor camera, select and transform actors with gizmos and snapping, group and merge actors, switch view modes and use the quad layout.
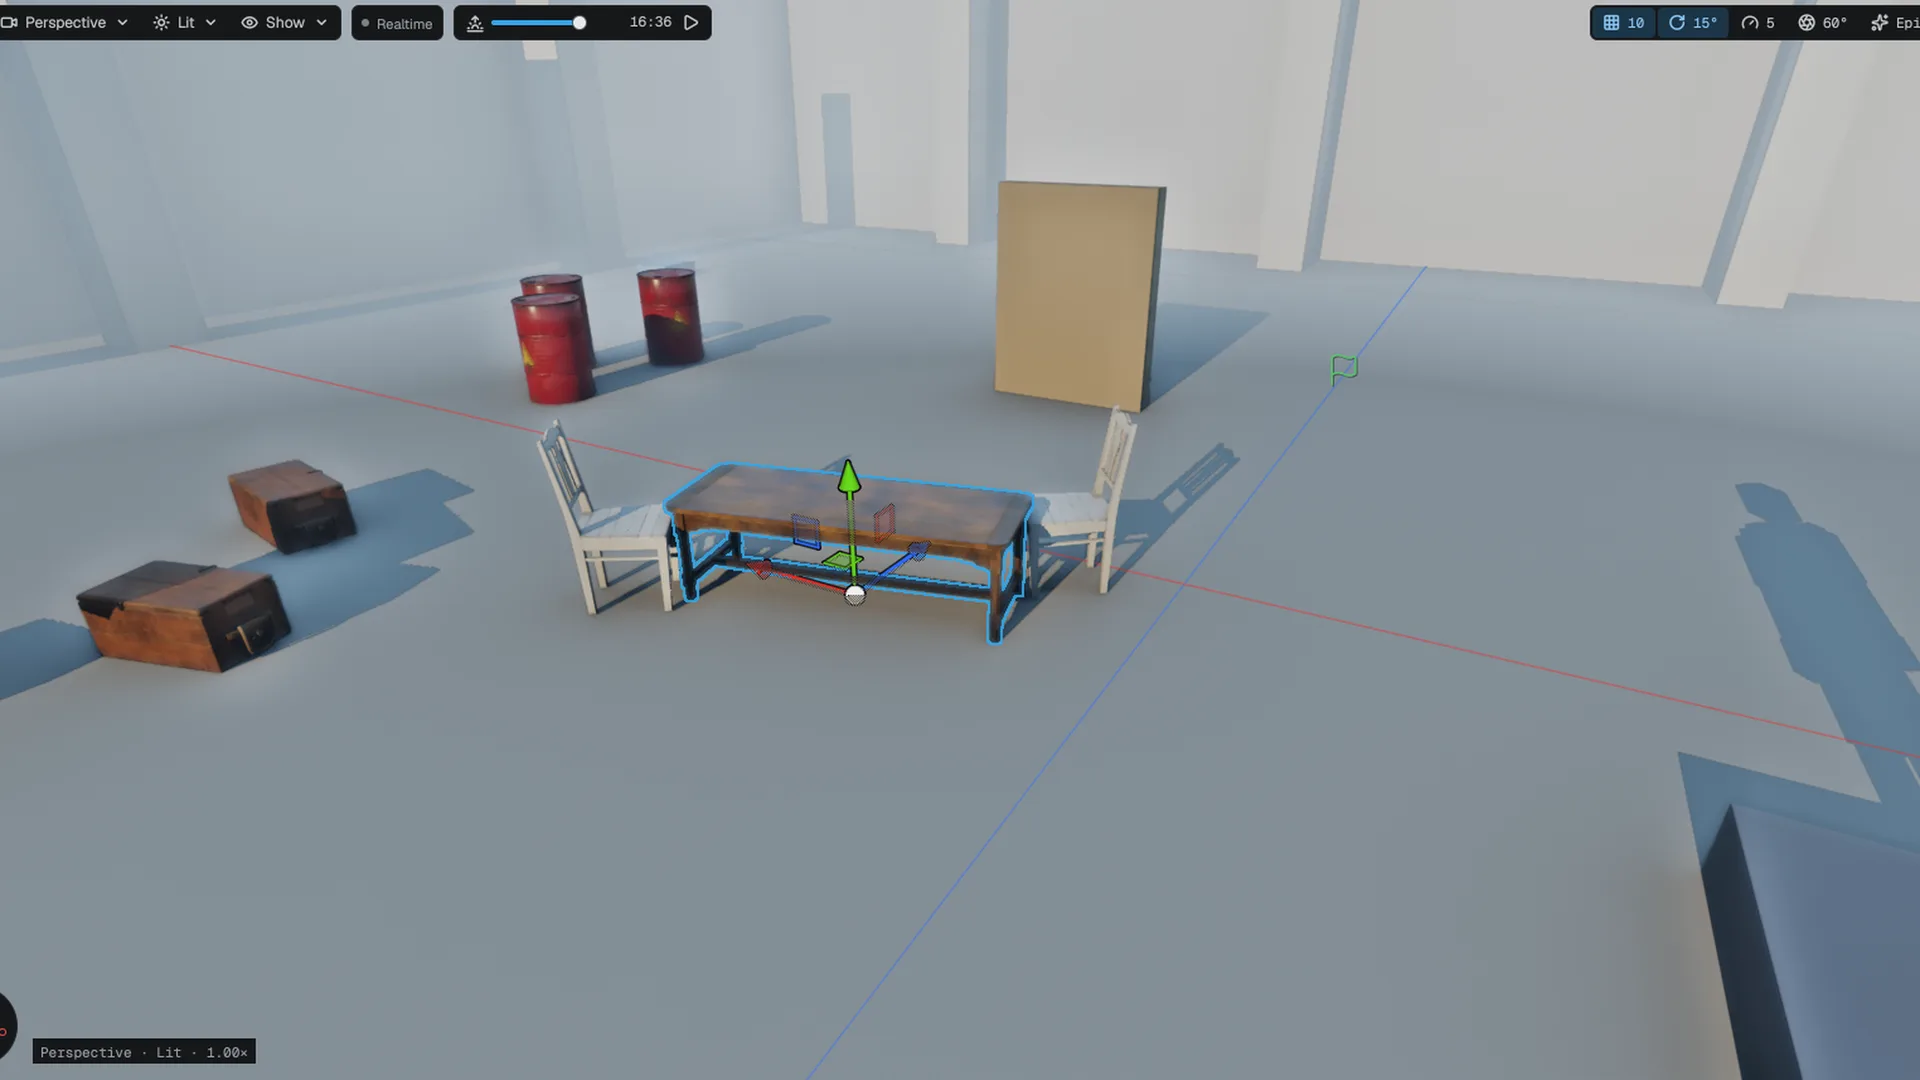
The level viewport is where you look at and arrange the open level. It renders the scene with the same renderer the game uses. What a click does depends on the active tool mode: selecting and transforming actors by default, or sculpting, painting and modeling when you switch modes.
Moving the camera
Hold the right mouse button to fly. The keys only move the camera while the button is down, so they stay free for other commands the rest of the time.
| Input | Action |
|---|---|
| Right mouse + drag | Look around |
| Right mouse + W A S D | Fly forward, left, back, right |
| Right mouse + Q / E | Fly down / up |
| Right mouse + Shift | Fly faster |
| Middle mouse + drag | Pan |
| Mouse wheel | Dolly; while flying, changes fly speed |
| Right click without dragging | Context menu |
| F | Frame the selection |
The viewport toolbar
The toolbar floats over the top of the render area:
| Control | What it does |
|---|---|
| Options (hamburger) | Every control below as a submenu, plus orientation, layout, realtime and immersive mode |
| Perspective | Orientation: Perspective, Top, Bottom, Left, Right, Front, Back |
| Lit | View mode |
| Show | Overlays and debug layers |
| Realtime | Whether the viewport ticks the scene continuously |
| Snap chips | Toggle grid and angle snap |
| Camera speed | Eight steps, each double the last, from 0.5 m/s to 64 m/s |
| Field of view | 20° to 135°, with presets |
| Quality | The current quality tier; opens the quality card on that same tier, including a tier the engine picked itself from your GPU |
When the viewport is too narrow, groups fold into the options menu, which lights up while anything is folded. The six fixed orientations use an orthographic projection, where the wheel zooms instead of dollying.
The Stats plate (Show ▸ Stats) at the top right lists frame rate, frame time, game-thread time, draw time, GPU time, draw calls, triangles and VRAM.
Bookmarks
Each viewport has nine camera bookmarks.
- Store a bookmark
Frame the view you want, then press Ctrl+Shift+1 through Ctrl+Shift+9.
- Jump back
Press Alt+Shift plus the same digit, or pick the bookmark from the bookmark menu.
In the quad layout a bookmark bar above the panes shows one chip per stored camera, with its name and recall shortcut, and an Add button.
Selecting actors
Selection is the default tool mode. Clicks resolve when you release the mouse.
| Input | Result |
|---|---|
| Click | Replace the selection; clicking empty space clears it |
| Ctrl + click | Toggle the actor in the selection |
| Shift + click | Add the actor to the selection |
| Drag on empty space | Marquee select; hold Shift to add, Ctrl to toggle |
Actors hidden in the editor and locked actors are skipped. The Outliner and the viewport share one selection. See Outliner and Details.
Hiding actors
| Shortcut | Command |
|---|---|
| H | Hide the selected actors |
| Ctrl+H | Show all actors |
| Shift+H | Isolate: hide everything except the selection |
Hiding is an editor-only flag, saved with the level and undoable. It never hides anything in a packaged game.
Transforming actors
Q, W, E and R switch the gizmo between Select, Translate, Rotate and Scale. The main toolbar has the same tools, a World / Local space toggle and the snap buttons.
With several actors selected, one gizmo appears at the last-selected actor. A drag moves the whole selection, and a child whose parent is also selected moves only once, through its parent. Each drag is one undo entry. While you drag, a card next to the cursor shows the change since the drag began and the absolute value: metres, degrees or a scale factor.
Snapping
| Snap | Increments offered |
|---|---|
| Grid (translate) | 1, 5, 10, 50, 100 |
| Rotation | 5°, 10°, 15°, 30°, 45°, 90° |
| Scale | 0.1, 0.25, 0.5, 1.0 |
With grid snap on, the pivot snaps to an absolute grid position and the rest of the selection keeps its offsets. The viewport grid then uses the snap increment as its cell, so a drag visibly lands on grid lines.
Vertex and surface snapping
Hold V while dragging to put a vertex of the dragged actor onto the nearest vertex under the cursor. Hold Shift+V to snap onto the surface under the cursor instead. The magnet chip next to the snap chips cycles Off, Vertex and Surface so you can arm it without holding a key. Grid snap does not apply on a frame where the vertex or surface snap found a target.
To stand a crate on a table corner, hold V, grab the crate near its bottom corner, and drop it on the table's corner. The crate's own vertex lands on the target, not its pivot.
Snap to floor
End (Edit ▸ Snap to Floor) drops each selected root actor straight down until its bounds rest on what is under it:
- The highest surface under the actor's footprint wins, so a crate half over a ledge lands on the ledge.
- An actor already sunk into the floor comes back up onto it.
- Meshes and landscape both count as floor; the selection never supports itself, so two stacked selected crates both drop to the floor.
- If nothing is below, the actor stays where it is.
Groups
Ctrl+G (Edit ▸ Group) groups two or more selected root actors under a new Group actor placed at the centre of their bounds; the members do not move. Shift+G (Edit ▸ Ungroup) moves the members back up and deletes the group.
A group is an ordinary parent, so it saves, undoes and goes into prefabs like any hierarchy. While the group is locked (the default; Edit ▸ Lock Group / Unlock Group), clicking any member selects the whole group. Unlocked, you pick members one by one.
Merge actors
Edit ▸ Merge Actors opens a dialog that combines the selected mesh actors. Tick the actors that take part in the table, pick a mode and set its options.
| Mode | Result |
|---|---|
| Merge | One new mesh asset under Content/Meshes/ and one actor that uses it |
| Simplify | As Merge, with each material section reduced to a percentage of its triangles first |
| Harvest instances | One actor that draws every ticked mesh actor as an instance; no new asset |
| Batch | One instanced actor per mesh that two or more ticked actors share |
Merge and Simplify options include Pivot at zero, Merge physics, the LOD selection and Merge materials. With a texture size chosen, Merge materials bakes base colour, normal and roughness/metallic atlases next to the merged mesh; Keep source textures keeps the source materials instead. Bake vertex data multiplies each material's base colour into the vertex colours. Replace source actors deletes the originals.
The level change is one undo step. A written mesh asset stays on disk after an undo.
The context menu
Right-click without dragging. The menu is built from what is under the cursor and what is selected:
- With a selection: the actor's name, Edit asset (Ctrl+E), Browse to asset (Ctrl+B), a Transform submenu (Reset location Alt+W, Reset rotation Alt+E, Frame Selection, Snap Selection to View, Pilot), Snap to floor, Cut, Copy, Paste, Duplicate and Delete.
- Place Actor Here ▸ with the same categories as Place actors.
- Duplicate Here and Paste Here.
- Play From Here: starts Play with your pawn on the clicked point, facing the way the camera looks.
- Bookmark, view mode and Show submenus.
Pilot attaches the selected actor to the camera so it moves as you fly, which is handy for aiming lights and cameras. Ctrl+Shift+P starts or ends piloting; ending it puts the camera back where the flight started, and the whole flight is one undo entry.
View modes
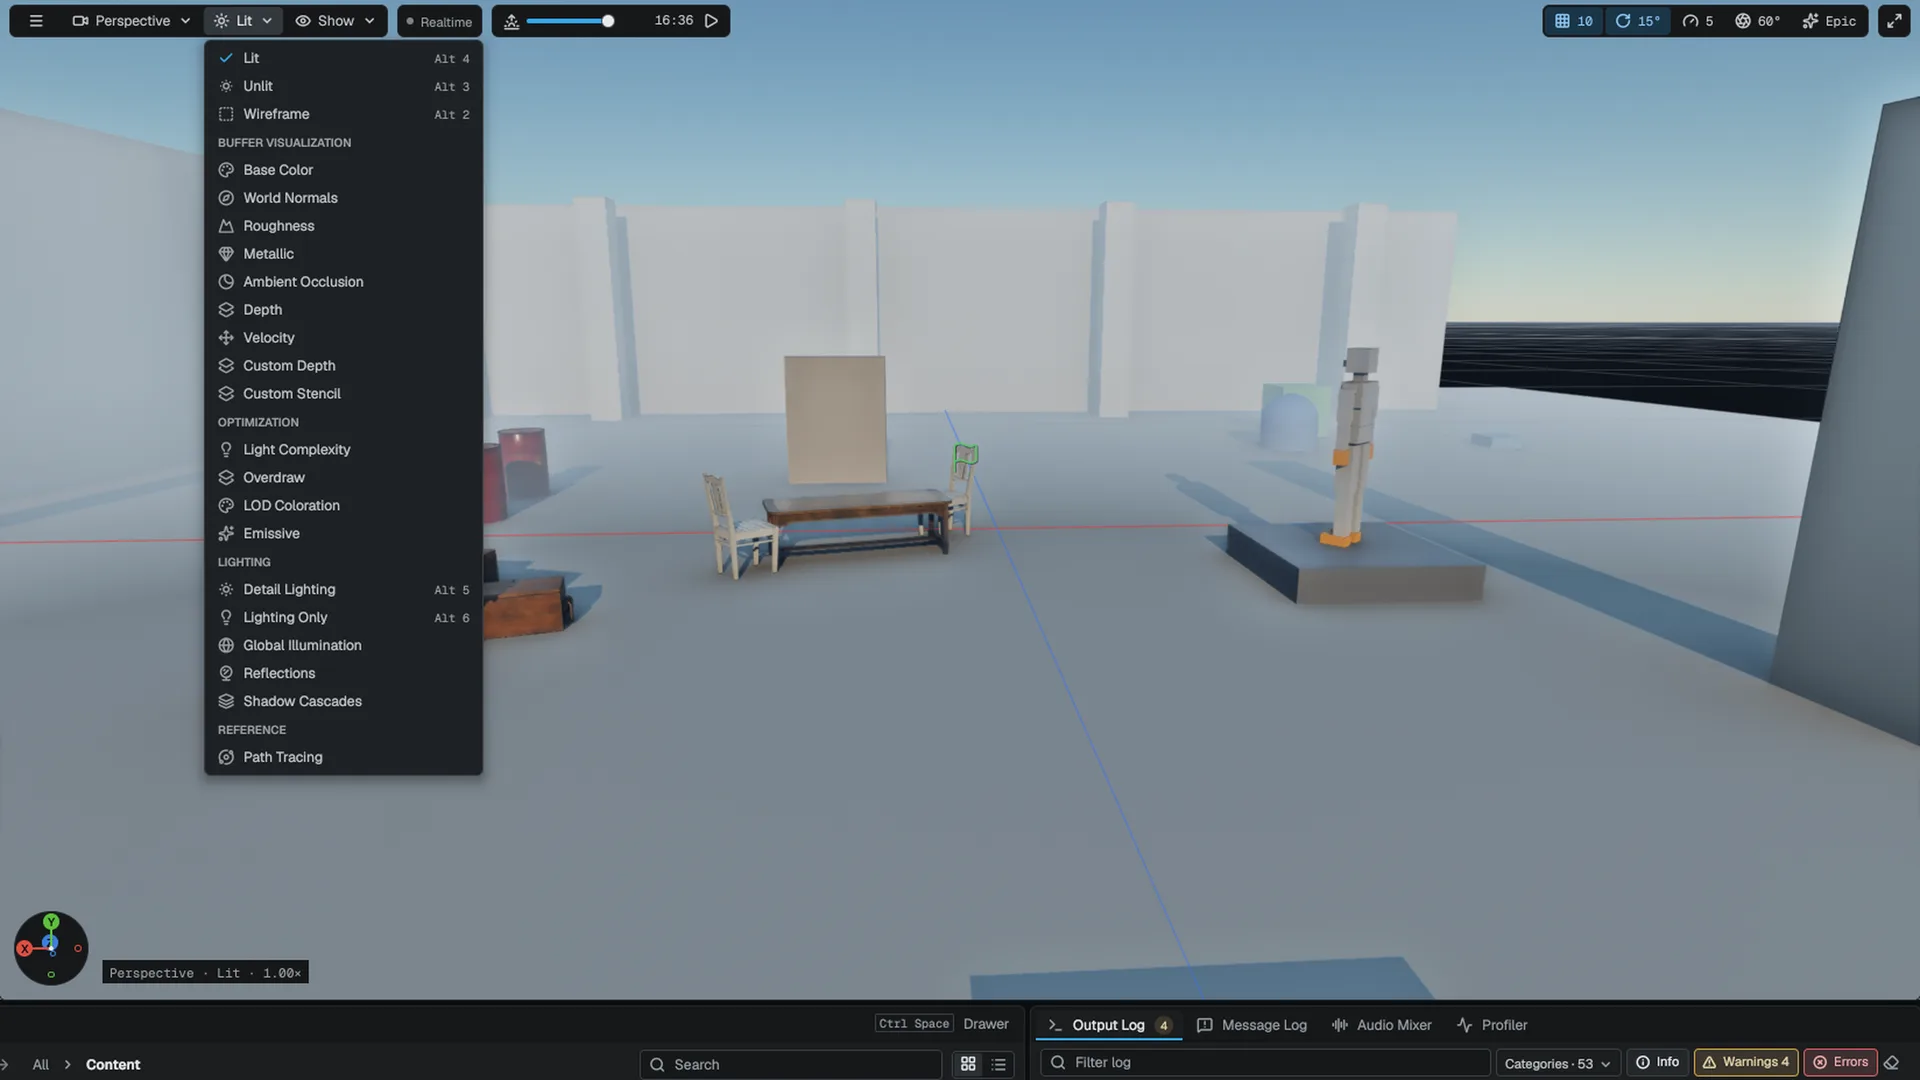
The view-mode dropdown lists the renderer's view modes, grouped as lit modes, buffer visualization, optimization views, lighting views and a path-traced reference.
| Group | Modes |
|---|---|
| Lit | Lit (Alt+4), Unlit (Alt+3), Wireframe (Alt+2) |
| Buffer visualization | Base Color, World Normals, Roughness, Metallic, Ambient Occlusion, Depth, Velocity, Custom Depth, Custom Stencil |
| Optimization | Light Complexity, Overdraw, LOD Coloration, Emissive |
| Lighting | Detail Lighting (Alt+5), Lighting Only (Alt+6), Global Illumination, Reflections, Shadow Cascades |
| Reference | Path Tracing |
The Show menu
Show opens with Game View (G): the level as the player sees it, with grid, icons, visualizers, outline and gizmos hidden, while the camera and editing still work. Below it are the per-viewport toggles:
| Toggle | What it shows |
|---|---|
| Grid | An infinite ground plane that fades with distance and coarsens as the camera rises; orthographic panes do not draw it |
| Component Icons | A clickable glyph over every entity without a mesh: lights, cameras, audio sources, emitters, volumes, player starts, triggers |
| Component Visualizers | Shapes of the selected entities: light radii and cones, camera frustums, collider capsules, audio ranges, volume bounds, splines |
| Selection Outline, Transform Gizmo, Orientation Gizmo | The editing overlays |
| Stats | The stats plate |
| Input Debug | One line per active input action with its phase and value, at the bottom left (the i.DebugOverlay console variable). The list stays inside the viewport at any UI scale: in a narrow viewport the lines are cut with an ellipsis, and rows that do not fit end in a +N more line |
A Debug Layers section toggles the engine's debug-draw categories: AI perception (dd.Perception), the navigation mesh (dd.Navigation), physics (p.Debug), audio ranges (dd.Audio) and selection bounds (dd.Bounds). They are console variables, so you can also set them from the console or the command line. See the console variables reference.
Tool modes
The mode rail on the left of the window, and these shortcuts, switch what the mouse does in the viewport. One mode is active at a time.
| Mode | Shortcut | What it does |
|---|---|---|
| Select | Shift+1 | Pick, marquee and transform |
| Modeling | Shift+2 | Edit level geometry: vertices, edges and faces |
| Landscape | Shift+3 | Sculpt and paint terrain |
| Water | Shift+4 | Edit water body splines |
| Props | Shift+5 | Place and paint props across the level |
| Foliage | Shift+6 | Paint instanced foliage |
| Spline | Shift+7 | Edit spline points |
Switching modes in the middle of a drag commits the drag first. Only the first viewport owns these shortcuts; extra viewports switch modes from the rail. Terrain, water, props and foliage are covered in World building, modeling in Geometry tools. Editor plugins can add their own modes (Plugins and extensions).
Single and quad layouts
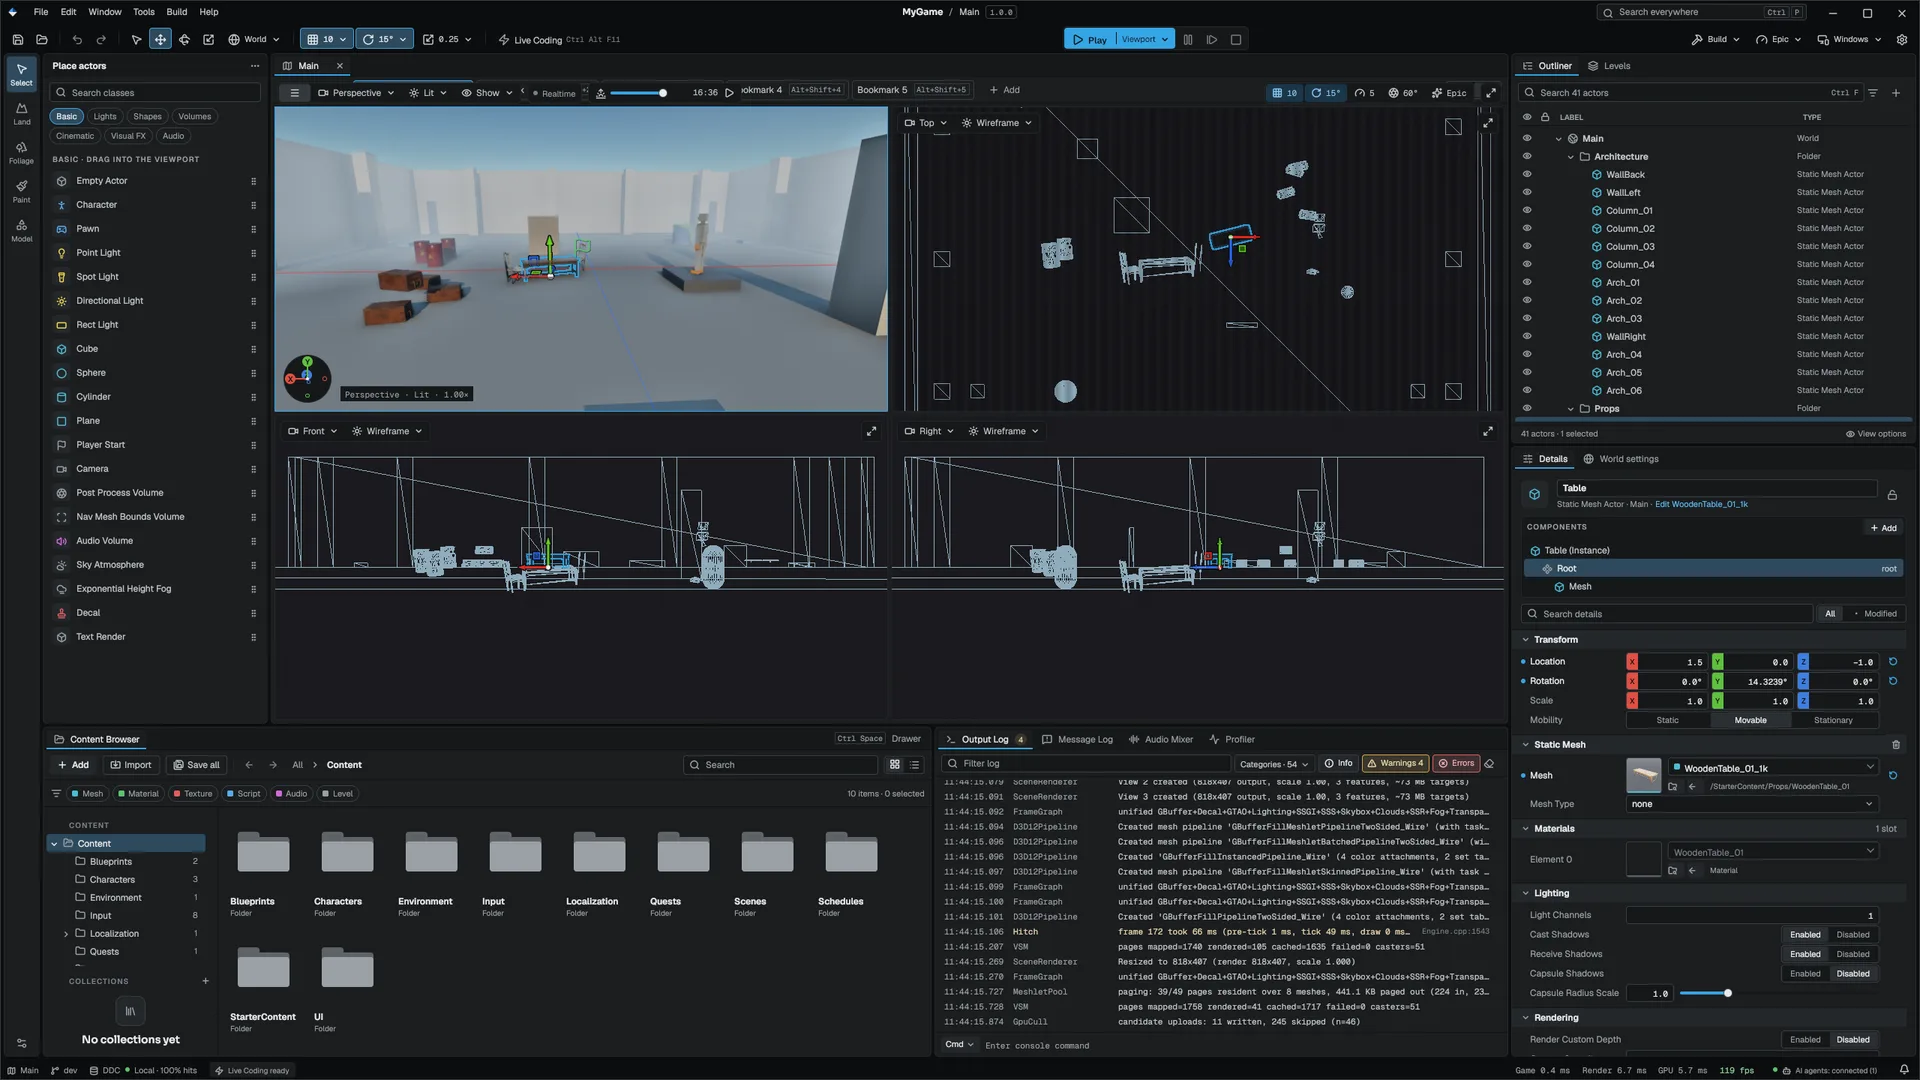
The layout button switches between one perspective view and a 2×2 quad layout: the interactive perspective pane plus live orthographic panes. Each orthographic pane has its own chips for orientation and view mode and starts in Wireframe.
- Hover a pane to make it active; the active pane has an accent outline and receives camera input.
- Picking, marquee selection, gizmo drags and Content Browser drops work in every pane, using that pane's camera.
- Drag the dividers to resize panes. Double-click a divider, or press Ctrl+Shift+M, to maximize the active pane and restore it.
To save GPU time, the orthographic panes skip shadows, ambient occlusion, Global Illumination, reflections, volumetrics, temporal AA, post effects, particles and the sky. The quad layout is only available while editing; Play switches to a single view and restores quad when you stop.
More viewports
Window ▸ New Viewport opens another viewport tab, up to four including the level viewport. Each has its own camera, view mode and show flags, and remembers them across sessions. See Main window.
Screenshots and immersive mode
| Shortcut | Command |
|---|---|
| F12 | Save a PNG of the viewport to Saved/Screenshots |
| Shift+F12 | High resolution screenshot dialog |
| F11 | Immersive viewport: hide the rest of the editor |
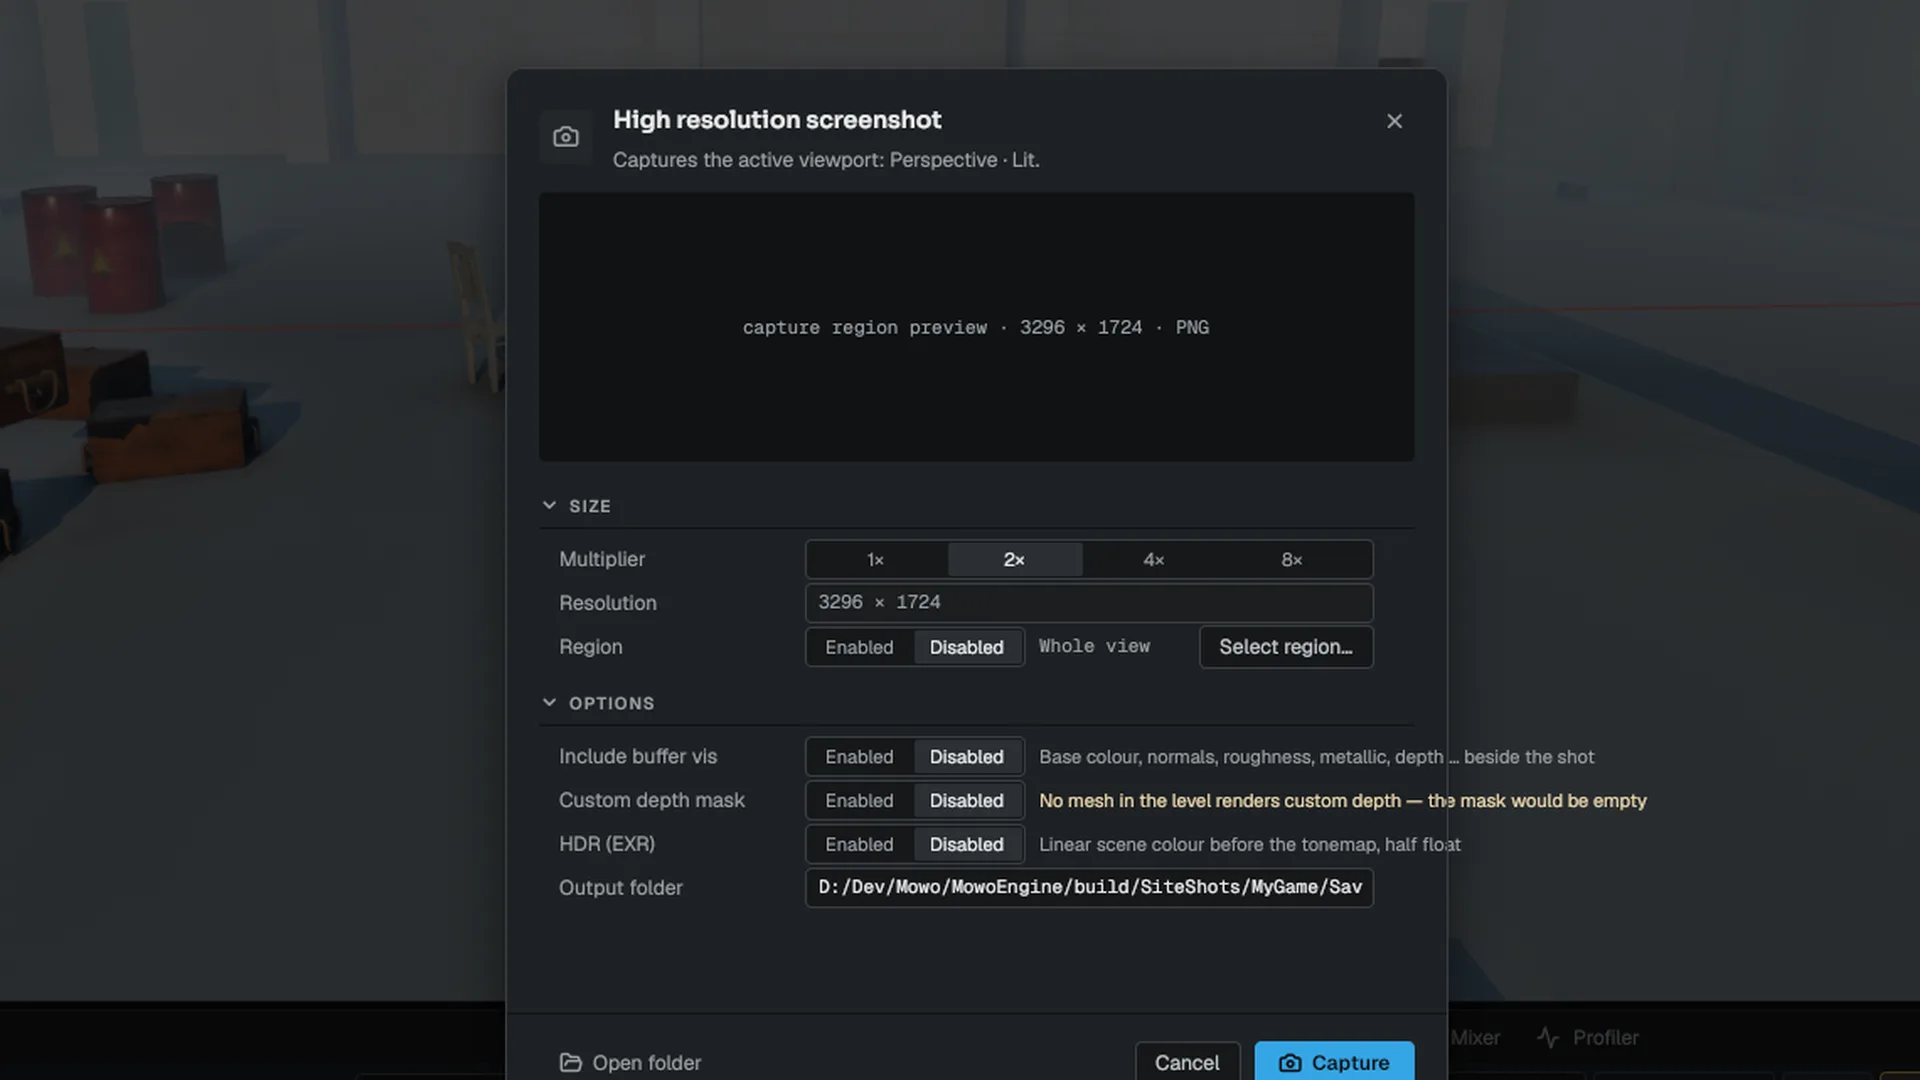
The High Resolution Screenshot dialog renders the perspective pane's framing at more pixels, without grid, gizmos or outline:
| Option | Effect |
|---|---|
| Multiplier | 1×, 2×, 4× or 8× the pane size, each side capped at 16384 pixels |
| Region | Select region… lets you drag a rectangle over the pane; the shot is cropped to it |
| Include buffer vis | Also writes Base colour, World normals, Roughness, Metallic, Depth, Emissive and Ambient occlusion as <name>_<Buffer>.png |
| Custom depth mask | Writes alpha 255 where a mesh with custom depth enabled was drawn, 0 elsewhere |
| HDR (EXR) | Writes the scene colour before tonemapping as a half-float OpenEXR file |
Related
- Outliner and Details for editing what you selected.
- Content Browser for dragging assets into the level.
- Play in editor for what the viewport does during Play.